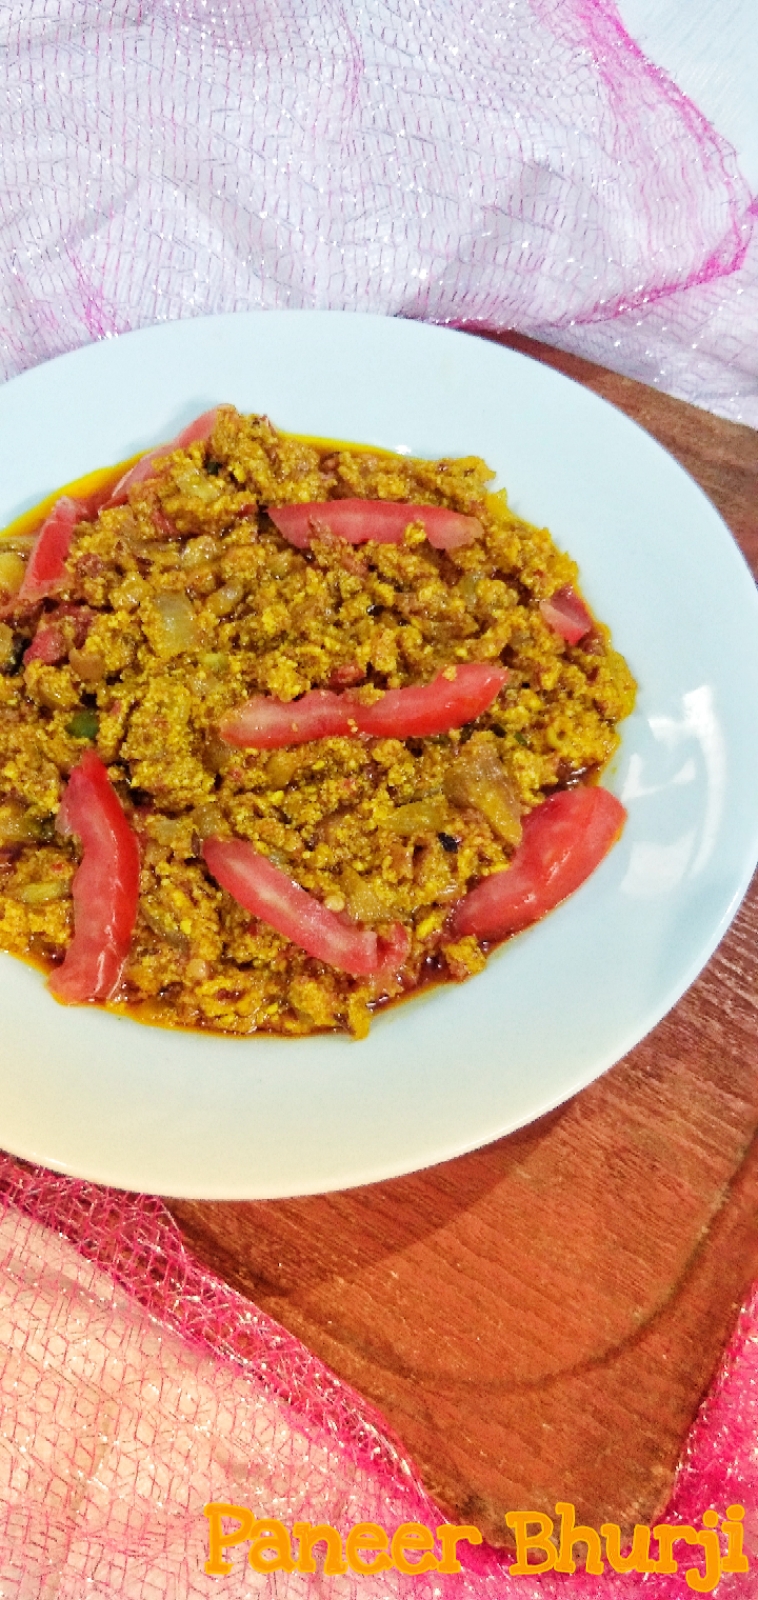
Friday, 25 May 2018

paneer bhurji

Paneer Bhurji
PaneerBhurji is the most convenient and a hassle free sabzi that can be easily made with few ingredients.I have made this bhurji with curdled milk and its equally yum as market bought paneer.
You can make this bhurji with normal paneer also,so not a hard and fast rule to follow this recipe :-)
Paneer known as cottage cheese is rich in protein and its really healthy to have it in lunch,breakfast or even dinner.


I like to eat paneer in any form weather gravy i.e. paneer butter masala or matar paneer or chili paneer all are my favorites and  their recipes are on my blog too.
Sometimes i do prepare paneer pyaz parantha but my daughter chinki prefers Paneer bhurji,as she loves to go to school when there is paneer bhurji in her tiffin :-D
You can enjoy this bhurji with crispy paranthas or chapati too.
So here is the yummy recipe of  PANEER BHURJI

Ingredients-

  • Paneer - 250 grams(crumble it)
  • Onions - 3 medium sized (roughly Chopped)
  • Tomatoes -4 medium sized (finely chopped)
  • Green chilies (optional)2 to 3(finely chopped)
  • Turmeric powder-1 tsp
  • Red chili powder - 1 tsp
  • Sugar-1 pinch
  • Cumin seeds - 1 tsp
  • Cumin powder - 1/2 tsp
  • Coriander powder - 1 1/2 tsp
  • Mango powder - 1 1/2 tsp
  • Salt as per taste
  • Salted butter - 2 tsp(add more if you are a butter lover like me ;-) )
  • Few slices of tomato for garnishing.


Method -

  • Take a wok add 2 tbsp oil heat it up
  • Now add cumin seeds and add onions and green chilies too.
  • Fry the onions till they turn pink in color
  • Now add turmeric powder,salt,red chili powder,sugar,coriander powder,mango powder and mix it well.
  • Add tomatoes and mix it with the onions.
  • Keep it till the tomatoes turns mushy.
  • Now when the masala starts leaving oil add paneer in it.
  • Stir it again for few minutes on low flame.
  • Now add cumin powder and butter in the paneer.
  • Mix it and your tender succulent Paneer Bhurji is ready to serve.
  • Garnish it with few raw tomato slices.
  • Enjoy it with paratha or fulka.

Saturday, 19 May 2018

Aam Ka Khatta Meetha Achar

Aam Ka Khatta Meetha Achar
Raw Mangoes are now easily available in abundance.The one reason i like summer season is my love for Mangoes.Sometimes in summer season we don't want to make any Sabzi because scorching summers makes us exhausted,so i have tried this sweet and sour condiment which makes me feel easy when i am not in a mood to cook and to eat some heavy or oil in my dinner or lunch.
This pickle is easy and very tasty to make.The taste of the pickle is mild spicy,i have added jaggery not sugar in it. Jaggery is good for digestion and far better than sugar and the color of the jaggery is enhancing the look and the taste of the pickle too.


I have added some roasted spices in the achar which are really good for health specially in summers.This pickle can be eaten with tadka rice or with some ajwain parathas. You can also give a try to eat this achar with namkeen matthis with a cup of tea...ahhaaa!
I love to eat this achar with butter toasted bread .As i always say everyone has its own taste buds,so its your choice that what you want to have with this pickle.
So here going the tangy sweet and mild spicy recipe of Aam ka Khatta Meetha Achar-


Ingredients -


  1. Raw mangoes - 1/2 kg
  2. Cooking oil-2 tsp
  3. Turmeric powder - 1/2  tsp
  4. Red chili powder - 1/2 tsp
  5. Coriander seeds - 1 tsp
  6. Cumin seeds - 1 tsp
  7. Fennel seeds - 1 tsp
  8. Black Peppercorns - 7 to 8
  9. Black salt - 1/2 tsp
  10. Normal salt as per your taste
  11. Mustard seeds - 1/2 tsp
  12. Asafoetida - 1 to 2 pinch
  13. Jaggery (powder it) - 1 cup
  14. Water - 1 cup

Method
1.Wash and peel the mangoes and cut it in slices
2.Take a wok heat it up and add cumin,coriander,peppercorns and     fennel seeds and dry roast in for few minutes.
3.Now ground all the roasted spices and keep it aside.
4.Now take a wok add oil and heat it up.
5.Add 1/2 tsp cumin seeds and mustard seeds.
6.let it crackle and add turmeric powder,asafoetida and some chili powder in it.
7.Stir and add your mango slices and mix it well.Cover it with a lid for 4 to 5 minutes or till the mangoes turns soft.
8.Take a small pan add jaggery and water in it.
9.Turn on the flame and mix it properly.
10.Stir it till the jaggery get dissolved completely in water and gets little thick.
11.Now add jaggery water in the raw mangoes and mix it well.
12.Add salt and black salt both.
13.Now add the roasted grounded spices too.
14.Cover the pickle with a lid for few more minutes,till the jaggery and roasted masala gets corporated in the mangoes.
15.Give a quick mix and your yummy Aam ka Khatta Meetha Achar is ready to serve.

Thursday, 10 May 2018

Strawberry CheeseCake

Strawberry CheeseCake

Cheese is my first love <3 and strawberries are my Bae!So i have tried them together ;-)
In India getting cream cheese is a big complication because its not easily available and if you acquire,then it is little expensive.
So i have made this cream cheese at home only and its just the same and delicious as market bought,but its more healthier than the market ones.
Cheesecake is a sweet dessert consisting of two or more layers,the bottom layer is made up of thin crust of biscuits with a mix of melted butter.
Cheesecake can be prepared in many flavors like blueberry,lime,orange,chocolates,mangoes or oreo. 


I have used curdled milk to make this cream cheese,so next time if your milk gets curdled,then do not worry about it go for this creamy and smooth textured cream cheese cake or else you can also make some salted spread by adding some salt and mixed herbs and just spread it on your bread...mmmm...sounds so yum na?
In this recipe i have used strawberry crush for strawberry flavor but you can also use some fresh strawberries also.A yummy and healthy dessert that can change your sad mood into a happy one as desserts always adds sweetness in your life :-)
Here goes the yum recipe of Strawberry Cheese cake-


Ingredients -
for base
10 to 12 biscuits(any biscuits digestive or good day)
Melted Butter - 2 tbsp

For cream cheese-
1 litre full fat milk
1 tsp white vinegar or lemon juice
2 tbsp curd
1 pinch of salt
Few drops of fresh lime juice
 2 tsp strawberry crush syrup

For topping
Strawberry crush syrup


Method 

  1. Firstly we have to make cream cheese for this you need to take a heavy bottomed pan and add milk to it.
  2. Give it a boil and add vinegar to it,and curdle the milk.
  3. You can increase the quantity of vinegar if it does not get curdled.
  4. Now separate the cheese from the milk and put it on a muslin cloth and keep it aside for 15 minutes.
  5. Now squeeze the excess of water from the cheese and take the cheese out and put it in a mixer jar with a pinch of salt and lemon juice.
  6. Now add 2 tbsp curd and few drops of fresh lime juice and again give it a good whisk.
  7. Check the consistency of the cream cheese,it should not be grainy,if its grainy add more curd and give a mix again.
  8. The cream cheese should be very smooth and not grainy.
  9. Your cream cheese is ready and keep it fridge.
  10. Now start getting ready to make the biscuit base.
  11. Take a ring mould or any round vessel and put a butter paper on it.
  12. Take 10 to 12  biscuits and crush them in a mixer jar .
  13. Add melted butter in the powdered biscuits and mix it well.
  14. Now spread this mix on the butter paper and with the help of spatula spread the mix evenly on the butter paper and keep it in the freezer for at least 1 hour or till it gets set and hard.
  15. After the base gets ready take it out.
  16. Now take out creamcheese and add 2 tsp strawberry crush and mix it gently.
  17. Spread the cream cheese on your biscuit base and spread it evenly with the help of a flat knife.
  18. Give it a light tap and again put it in fridge for at least 5 to 6 hours,till it gets set.
  19. After 5 hours take it out from the fridge and demould the ring very gently.
  20. Now pour some strawberry crush on the top of your cream cheese.
  21. Your Strawberry cheese cake is ready to enjoy.

Wednesday, 2 May 2018

Ma Choliyan Di Daal

Ma Choliyan Di Daal 
This daal is also called as langar wali daal as it is served as a holy food in Gurudwara. They make this daal without onions and garlic and serve it with fulkas known as Parshada.
I have made this daal in Punjabi style by adding loads of garlic as well as onions too.
This daal is the most simplest and yummiest daal. I normally make this daal when my mom comes to my house,as its her favorite and i love to cook this for her <3 
Ma Choliya Di Daal can be accompanied with hot steaming rice as well as roti too but i love to have this with raw bread and some green chilies.Everyone has its own taste-buds Right? ;-)

  
Pulses are  very healthy source of food,full of nutrition as its full of proteins and increases your energy level.This daal is made up of combining the two lentils split black urad and chana daal.
As you all know chana daal is the most energetic daal,it gives instant energy.
This Ma Choliya Di Daal is minimally spiced as it .I have not used many spices as the onions,garlic and ginger adds its own aroma to it.
You can also cook this daal in one pot meal but i have given a special tadka to it,as garlic's fragrance really do wonders if it is little fried.
So a must try regular day to today recipe is here-


Ingredients-

  1. 150 grams black split urad daal and 100 grams chana daal
  2. Ginger-1 tbsp (finely chopped)
  3. Garlic half pod (crushed)
  4. Green Chilies -2 to 4
  5. Onions - 2 medium sized (roughly chopped)
  6. Oil or Desi ghee - 1 1/2 tsp
  7. Cumin seeds - 1 tsp
  8. Red chili powder- 1 tsp
  9. Turmeric powder - 1/2 tsp
  10. Sugar -1 pinch
  11. Coriander powder - 1 1/2 tsp
  12. Garam masala - 1/2 tsp
  13. Salt as per taste
  14. Dry mango powder - 2 tsp(I like some tangy flavor in daal)

Method 
  1. Wash both the daals together and soak them in water for 1/2 an hour.
  2. Now take a pressure cooker add daal with 3 to 4 cups of water and some salt and go for  4 to 5 whistles.
  3. Now take a wok add oil heat it up.
  4. Add cumin seeds,garlic,ginger and green chilies.
  5. Add onions and saute it.
  6. After this add salt,turmeric powder,mango powder,coriander powder,sugar,garam masala and red chili powder.
  7. Stir it for few minutes.Switch off the flame.
  8. Now check your pressure cooker that the daal has cooked up properly.(if not add more water and pressure cook again.It depends on the quality of lentils also)
  9. Mash the daal with a ladle to make it mushy.
  10. Now add the fried onion masala in pressure cooker filled with daal.
  11. Add more water if needed,as some people like to eat thick daal and some like to have little runny one.
  12. Go for a good boil.
  13. Your  Ma Choliyan Di Daal is ready.
  14. At the time of serving this daal you can pour a teaspoon of desi ghee.
  15. ]Enjoy your delicious Daal.

Tuesday, 24 April 2018

Rajma Masala

Rajma Masala
Nothing can beat a bowl full of rajma with hot steaming rice and raw onion.Sounds delicious na!
Rajma is everyone's Best - Loved dish. Rajma is mainly cooked in thick gravy with many Indian whole spices and usually served with rice.I have made a pure Punjabi version of Rajma i.e. which is prepared with garlic and loads of Indian spices.
Rajma known as red kidney beans is soaked overnight and cooked in onion tomato masala and a plethora of classic Indian spices.


What to cook specially on Sundays is a big problem for all,so i always have a fixed menu of Rajma Chawal its my family's favorite and mine too ;-) 
A convenient choice for lunch or dinner is here.You can serve this rajma masala with rice,bread or roti. But i prefer this with my salted zeera rice.
Rajma Rice is My Bae  <3 and i can have this anytime.
So try out this yummy recipe on Sunday and make it everyone's bae :-)


Ingredients -

  1. Kidney Beans 1 cup (soaked it overnight)
  2. Onions 2 medium sized 
  3. Tomatoes 4 medium sized(i have chosen red ones)
  4. Garlic cloves - 7 to 8 pieces
  5. Ginger - 1 small piece
  6. Cumin seeds - 1 tsp
  7. Bay leaves - 2 leaves
  8. Coriander powder - 1 tbsp
  9. Salt as per taste
  10. Turmeric powder - 1/2 tsp
  11. Dry mango powder - 2 tsp
  12. Red chili powder - 1  tsp
  13. Dry red chilies - 2 to 3
  14. Desi ghee - 1 tsp
  15. Sugar - 2 pinches
  16. Garam masala - 1 tsp
  17. Fresh coriander leaves for garnishing


Ingredients -

  1. Drain the kidney beans and wash in fresh water and put it in pressure cooker.
  2. Add 4 to 5 cups of water and salt and pressure cook it till 5 to 6 whistles are given out.
  3. After whistles when the cooker cools down keep it aside.
  4. Now take a wok add oil around 2 tbsp.
  5. Add cumin seeds and bay leaves and let it crackle.
  6. Now make a paste of onions,garlic,ginger and dry red chilies.
  7. Add this paste in the oil.
  8. Now add turmeric powder,salt,coriander powder,dry mango powder,red chili powder and sugar.(do not add garam masala now)
  9. Fry them till the masala turns little brown in color.
  10. Take tomatoes and make its puree and add it in the onion masala.
  11. Now time to stir stir and stir.
  12. When you will find that the masala has started leaving oil add garam masala.
  13. After that add this masala in your kidney beans cooker.
  14. There must be enough water in the cooker,but it also depends on the quality of rajma,some rajma absorbs more water also.
  15. If you are finding less water,then add more water and get a good boil.
  16. Mash the beans to get a thick gravy texture.
  17. Lastly add desi ghee and mix it well.
  18. Garnish your Rajma with fresh coriander .
  19. Your Rajma Masala is ready to enjoy.

Wednesday, 18 April 2018

Masala Daliya

Masala Daliya

Daliya known as broken wheat is prepared from crushed grain of various different wheat varieties.It is mainly served to kids and adults to which helps in weight loss. Daliya can be prepared with moong dal by adding various spices to make it more delicious.
But some people are really adamant for having daliya because they feel its a food for sick and weak people.Normally daliya is made with less spices and less oil,due to its insipidness people are not in a mood to have this in regular days,they find it boring and tasteless :-( So i have tried this daliya in a chatapata form,as no one will say NO to it.


 In this Masala Daliya i have added vegetables and some flavor of garlic which is going to give a good aroma to it.I have also accompanied daliya with some raw mango slices and cumin curd which adds a tangy flavor too. Daliya is the most simplest dish which can be served with various varieties like pickle or some crunchy papads or bhujiya too. Bhujiya ahh!I remember those summer days when my mom used to make daliya for my weak tummy and i have to eat that daliya with a boring sad face ;-) ,when i use to deny she always says me "OK i will give you some Aloo Bhujiya" and this made me little relieved to eat that tasteless daliya. Haha! Childhood Memories.


So a must try recipe which is made in few minutes and your family is going to relish this without making any sad faces and they are going to demand this everyday in their breakfast.
You can give this daliya in your kid's tiffin too.Make this daliya in night for dinner and the very next day you can serve it in breakfast and it tastes more yum.
So here goes the tangy recipe of Masala Daliya-

Ingredients -

  • 1 cup daliya (broken wheat)(i have used roasted daliya)
  • 2 tsp ghee or oil
  • 1 tsp crushed garlic
  • 1 tsp cumin seeds
  • 2 pinch of asafoetida 
  • 1/2 cup boiled american corns
  • 2 small finely chopped tomatoes
  • 2 small finely chopped onions
  • 1/2 tsp turmeric powder
  • 1/2 tsp chili powder(optional)
  • 2 pinch of  black pepper powder
  • 1/2 tsp coriander powder
  • 1 tsp dry mango powder
  • Salt to taste
  • 6 cups of water
  • (you can add as many vegetable as you want like carrots,peas,french beans or capsicum)

Method -
  • firstly take a pressure cooker and put daliya along with water and wait for 3 to 4 whistles.
  • Now take a wok add ghee and add cumin seeds and asafoetida and let it crackle.
  • Now time to add garlic and onions.Saute them till they turn pink in color.
  • Add tomatoes and corn too.
  • Stir them properly.
  • Add turmeric,salt,red chili powder,coriander and mango powder.
  • Add little water and cover it with a lid for 3 to 4 minutes.
  • Now switch off the flame and add your masala veggies in the pressure cooked daliya.
  • Mix it well,you can add more water also(depends on the consistency that you like to eat)
  • Lastly serve your Masala Daliya by sprinkling some crushed black pepper powder and with some chilled cumin curd and with some chili flaked raw mango slices.


Friday, 6 April 2018

Masala Makhana

Masala Makhana
Makhana also known as Fox nuts is a popular fasting food.Its health benefits are superior to those of dry fruits like almonds or walnuts. Makhana is rich in proteins,carbohydrates,fiber,zinc and iron.They are high in fiber content,as it enables weight loss also.
When i was a kid and my mother use to feed me fox nuts and i have never found it even eatable because its tasteless.I used to chew the makhana and it was a task for me to gulp them down ;-p.
One day my mom made these makhanas and i had them with a smile on my face."Thank God" it was tasty and i couldn't stop myself from eating them.
After that day i have started loving makhanas and now i make them for my daughter as well as my family.


 These fox nuts are crispy,crunchy,tangy and spicy too.I have roasted them with home made ghee and believe me its really yum and you can enjoy it with your evening tea.
You can give these makhana in your kid's tiffin too or in the morning your kids can have this with milk.
Masala Makhana is a tummy filler snack and its very beneficial in constipation because it high in fiber content.
Makhana is really good specially for ladies who are above 30.Women normally lack in calcium and they feel pain in their knees or back,so start taking the makhana in your diet everyday and get rid of  health problems.
So here goes the simple recipe of Masala Makhana


Ingredients-

  1. Makhana - 1/2 kg
  2. Ghee - 3 to 4 tbsp
  3. Salt as per taste
  4. Red chili flakes - 1 tsp(you can avoid this if you don't want your makhana to be spicy)
  5.  Dry mango powder - 2 tsp

Method -
  1. Take a deep wok and heat it up.
  2. Add ghee in it.
  3. When the ghee is heated up add some salt in it.
  4. Stir it and add makhanas.
  5. Now add red chili flakes and dry mango powder.
  6. Roast it on a low flame.
  7. Stir it nicely,to coat the masala properly and drizzle some more ghee.
  8. You can feel a chili smoke,so be careful while roasting it.
  9. Now around after 5 to 7 minutes check the makhana by pressing it.
  10. If they have turned crispy then turn off the flame.
  11. Your Masala Makhana is ready to enjoy.

Chili Garlic pasta

Chili Garlic Pasta Aaj khane me kya hai Mama...kya chahiye Miss Drama :-P ?Pasta...You have enjoyed this advertisement with your kids,and ...